Setting Up Jupyter Notebooks On Google Cloud
Introduction
This short post is about how to quickly get set up with Jupyter notebook on the Google Cloud Platform. I wrote this as a tutorial as part of a guest lecture on Numerical Linear Algebra, you can see that lecture here.
In this post I will show you how to get set up using Jupyter on Google Cloud Platform (GCP) and install many of the Python packages I will use in my lecture. Using Google Cloud allows us to use Python and Jupyter notebook without needing to install anything on your computer or worry about different hardware requimrments or operating systems. All that is needed is access to web browser (preferrably Chrome) and to sign up for the free trial to GCP. We should be able to start and access this notebook from anywhere that has internet connection! I won't be going over fancy tricks or worry too much about security, but rather show the minimum to getting up and running with Jupyter on GCP.
Let's get started!
Creating The Instance
A Virtual Machine instance in GCP is just a computer that Google cloud owns and that we can SSH onto to and use as our own. Our interaction with it will be limited to use of the terminal console. If you have limited experience with working on Linux through the command line see my blogpost here for an introduction.
The ability to quickly and easily start up instances and shut them down while only paying for what you use has lead to the rise of cloud computing. Along with high speed internet, the availability of cheap computing resources without the need to directly maintain it has lead to a new revolution in computing and the web.
We can create an instance by going to https://cloud.google.com/ and click on the "Compute Engine" tab as shown below:
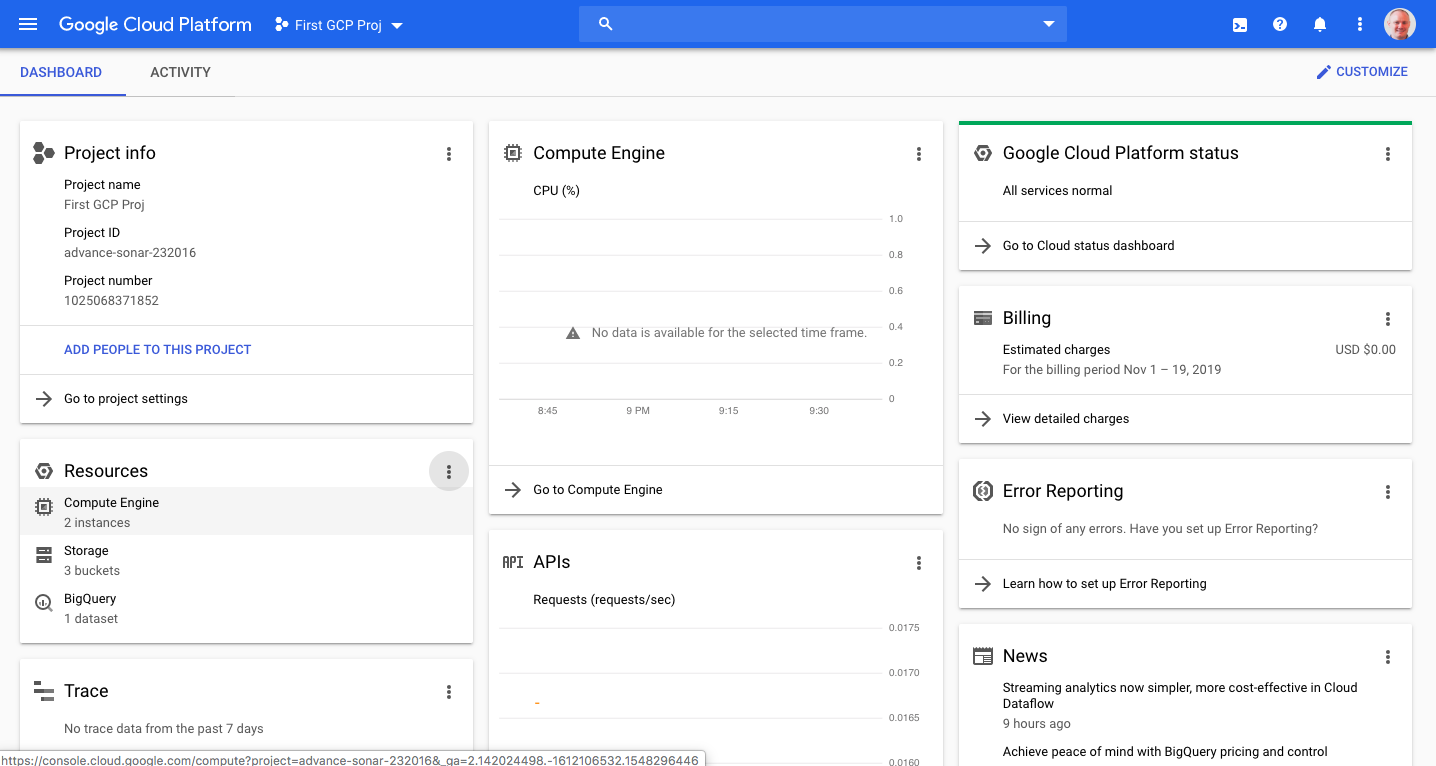
Then click "Create Instance"

The VM stands for Virtual Machine, you can read more about Virtual Machines here. When we create our instance we select what type of machine we want with choices in the number of cores, RAM, operating system and disk space. The depending on specifications our machine will (usually) be available for us to use in a matter of seconds!
You can see the machine which I gave the name "numlinalg4ml" below:
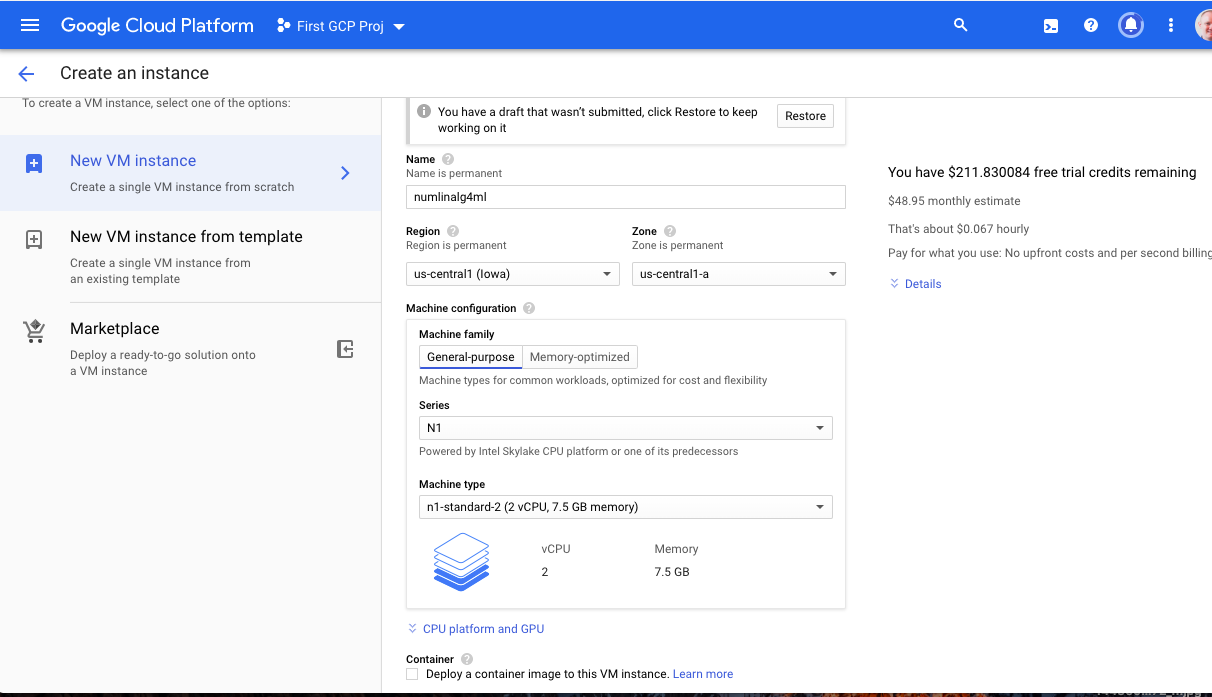
The choice of Region and Zone is inconsequential for the lecture, but has implication if you run website and/or care about how fast data needs to be transmitted to and from your instance.
As can be seen we choose a general purpose machine (n1-standard-2) with Ubuntu 16.02 with 10GB of disk space.
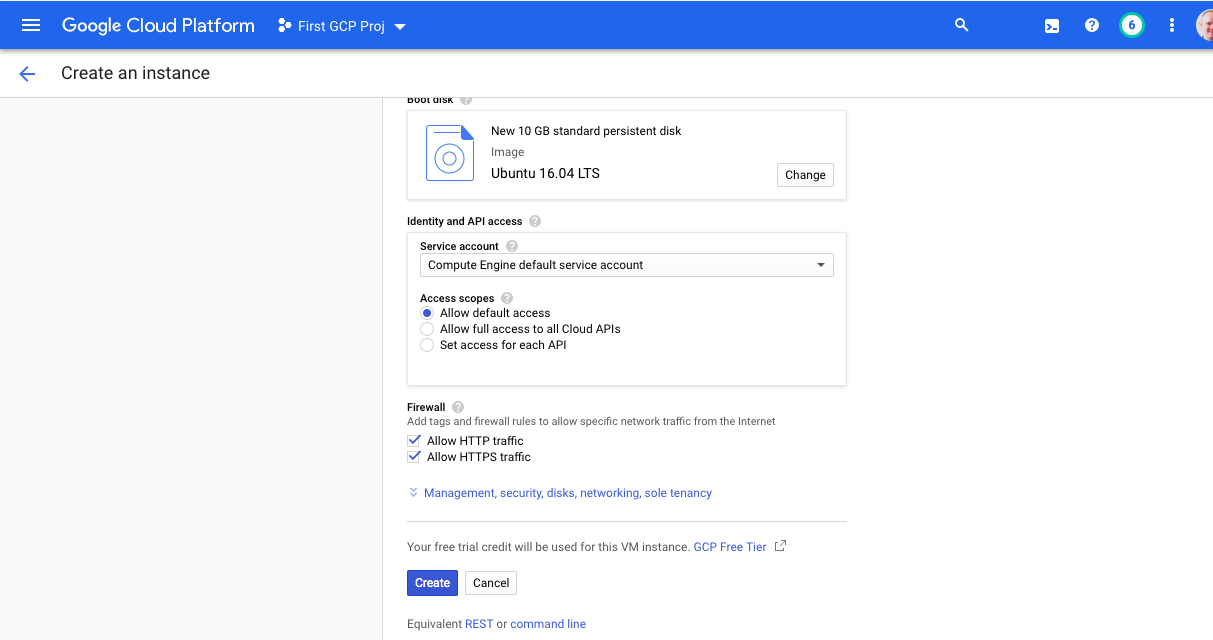
As Jupyter runs through your web browser it is important to allow both "HTTP traffic" and "HTTPS traffic" through. Once were done we can click "create instance" and we will see our instance start up in a matter of seconds. We can connect to it, but before we do we need to set up our Firewall Rules.
Setting VPC Firewall Rules
The reason we need to create firewall rules for our instance is because Jupyter will spin up a web-server and we need to be able to connect our web browser to it. The simplest way to do this is allow internet traffic through a specific port on the instance. Since Jupyter naturally runs on 8888 we will allow traffic through this port. However, I should remark that this method is not secure and anyone with your ip address and port can gain access. Therefore, if you are working with sensitive data you should not be doing this and instead use an ssh-tunnel or some other secure connection.
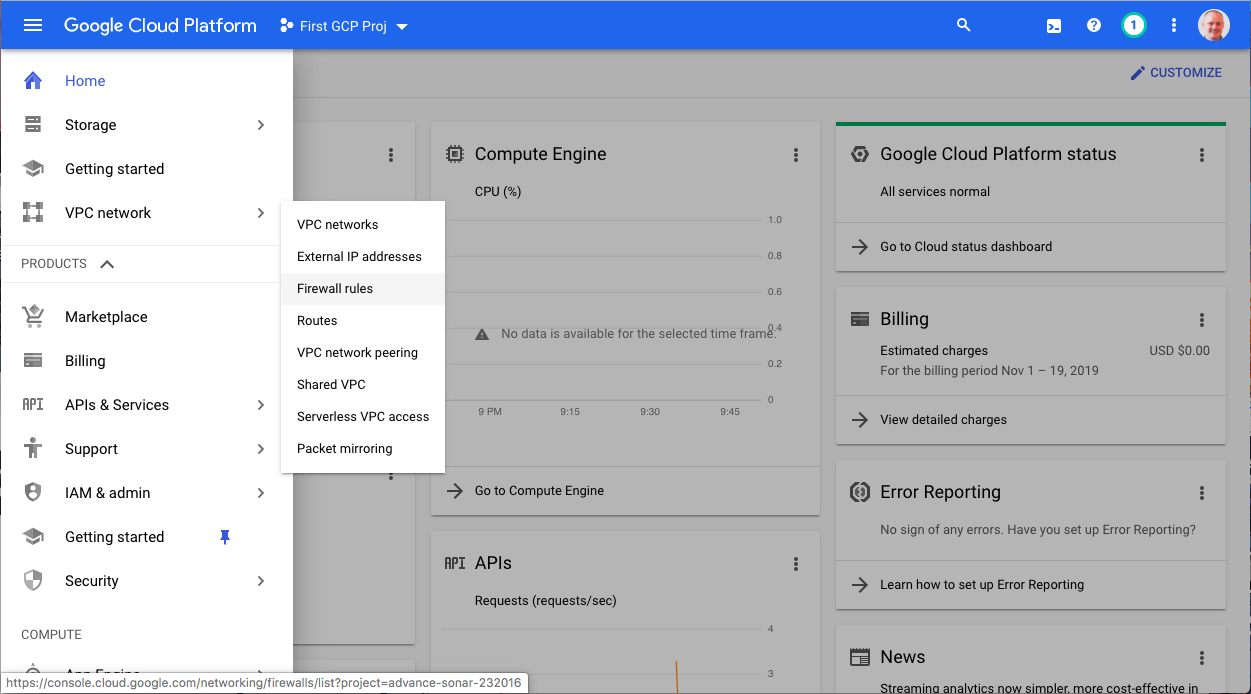
The first thing we do is go to the Home tab and click on "VPC Network" and select "Firewall Rules" form the dropdown.
Next we need to give a name to our "Target tags", I chose "num-linear-algebra", but your name could be anything. We then set the "Source IP Ranges" to "0.0.0.0/0" and specify "tcp 8888" under "Specified Protocols and ports".
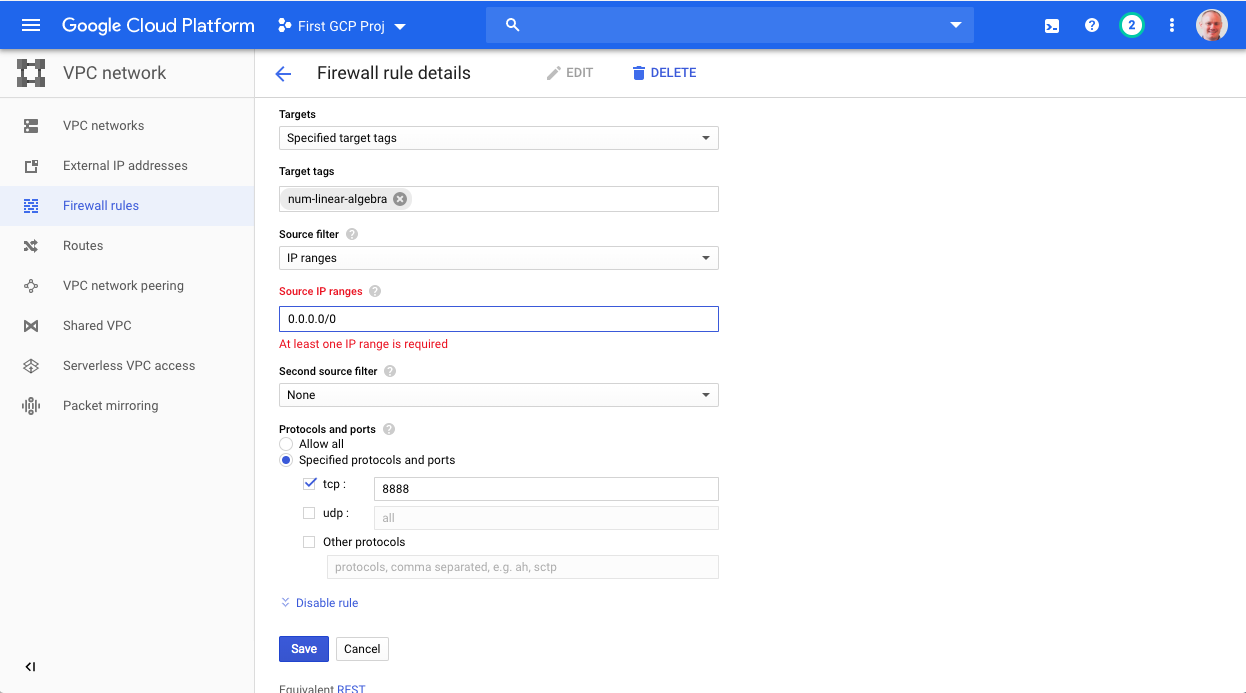
We can then hit save and go back to our "Compute Engine" page.
Connecting & Setting Up Jupyter Notebooks
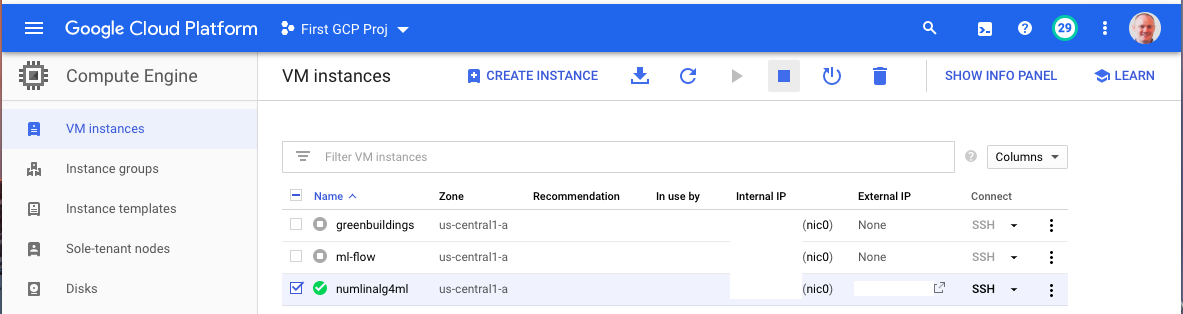
Now we can see that our instance has start up from the green check mark to the left of its name, as shown below:
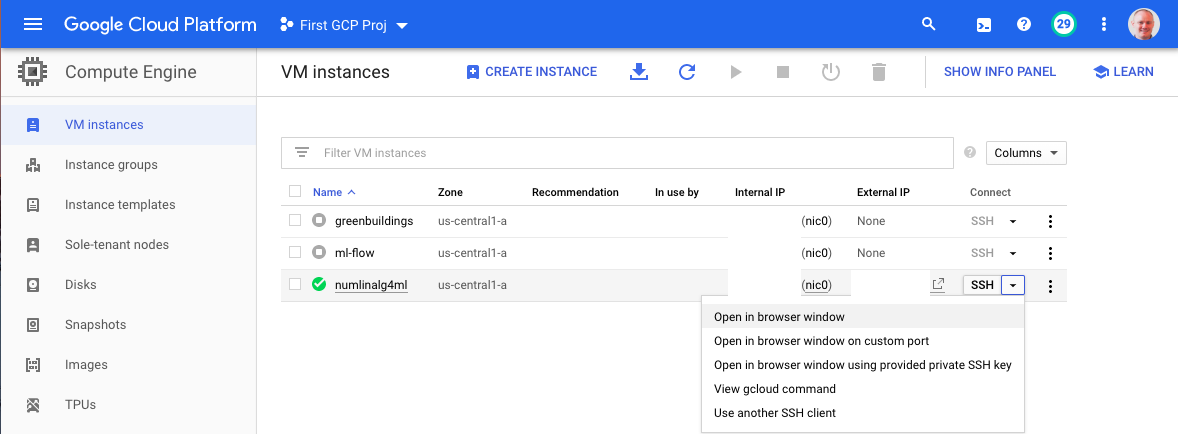
Note the the address for the external IP, we will be using this later. Now we go to right of the instance name and click on the "SSH" tap and select the first item from the drop own, i.e. labeled: "Open in browser window".
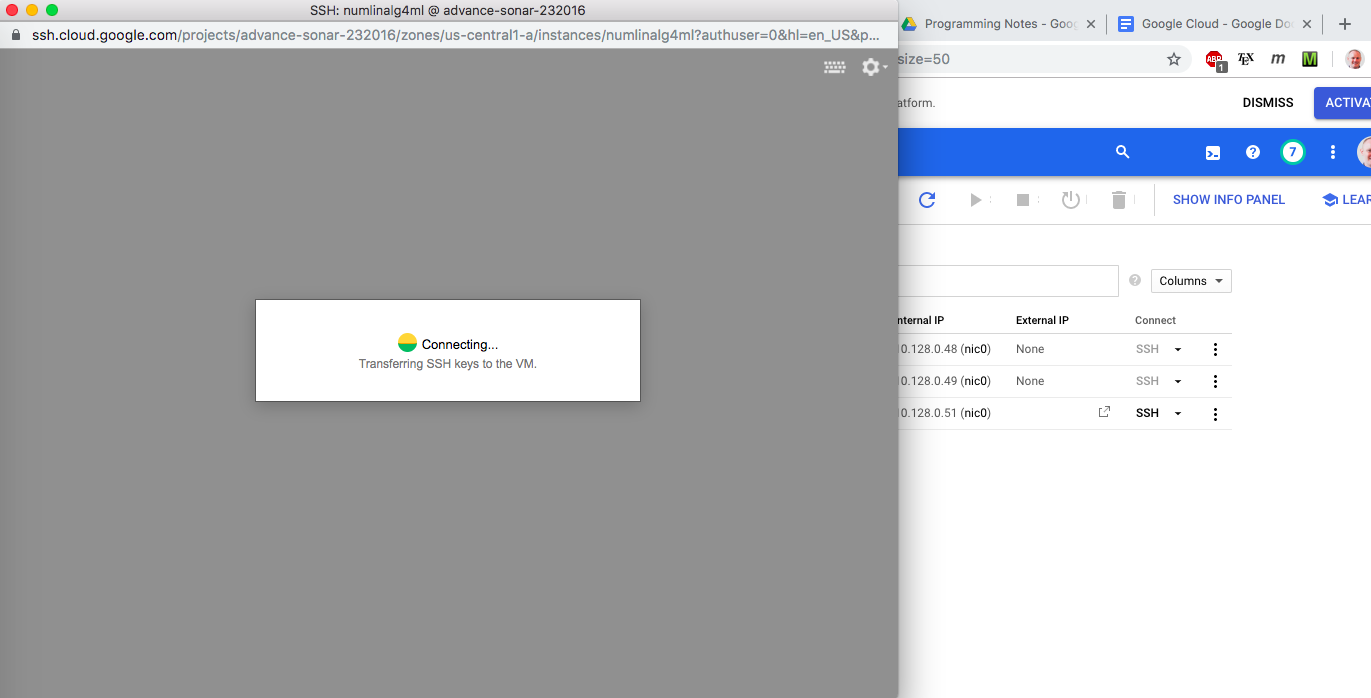
You should then see new tab open up that looks like:
Once an SSH connection has been established to your instance you will see the following:
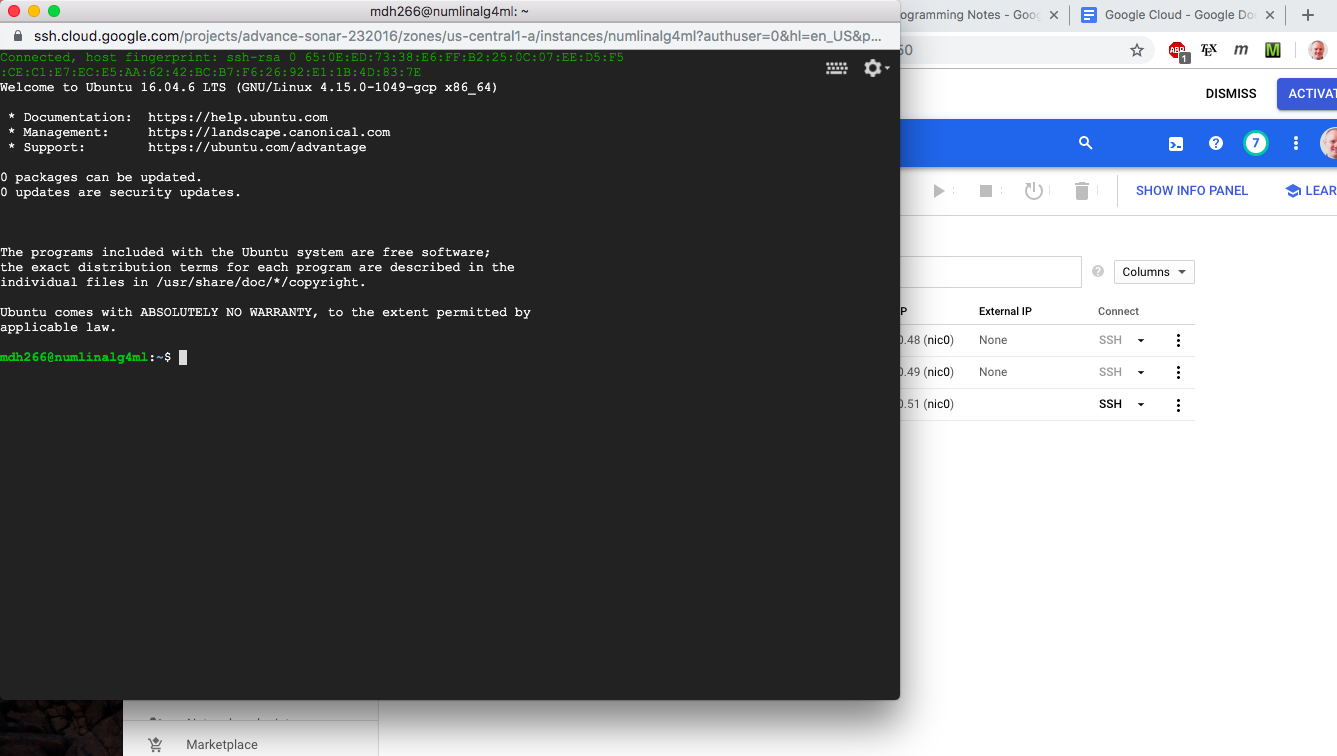
Now we're on the GCP instance!
The first thing we want to do when connect to our new instance is to update Ubuntu and install git and Vim. This is accomplished through the commands:
sudo apt update
sudo apt install git vim -y
Next we clone this repo:
git clone https://github.com/mdh266/JupyterOnGCP.git
And then go into the resulting directory:
cd JupyterOnGCP
In this repo created a script called install.sh to install Python, Jupyter and the required libaries for the lecture. To use the script run the command:
source install.sh
You should see a bunch of items being downloaded and configured in your terminal and if the script ran successfully you should see the result:

I don't want to go to into the details of the script, but I basically tweeked the official Dockerfile for Miniconda3. I decided against using Docker more broadly for this lecture because it introduces complexities that would take too long to get into. One complication did arise from my set up and that is that I found out users don't have ability to install libraries directly into a base conda environment. To get around this I had to create a miniconda environment and connect it to Jupyter as described here.
After everything has been successfully installed we can start the Jupyter notebook with the command:
jupyter notebook --ip=0.0.0.0 --port=8888 --no-browser
This will result in a few links poping up like those below
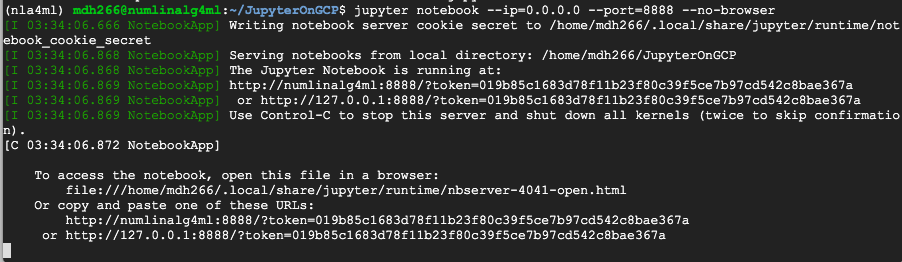
Copy the link into you a new tab in your web browser and replace the 127.0.0.1 with the external ip address of your instance. A new screen should show up with the following;
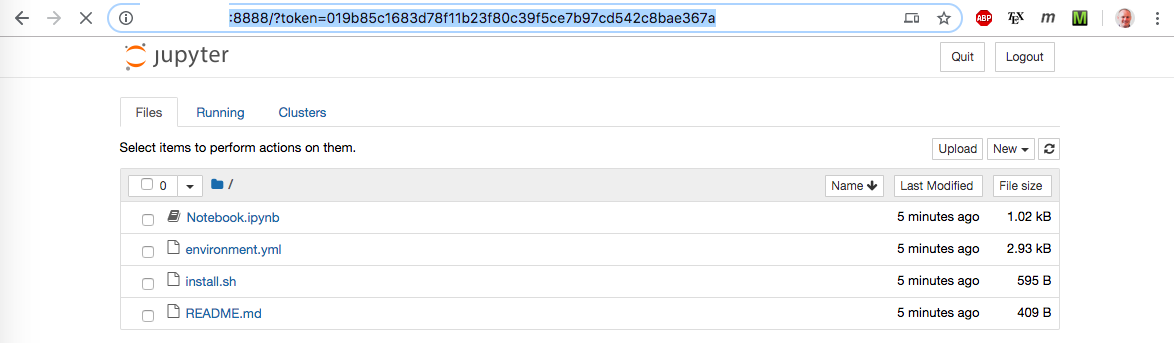
Click on Notebook.ipynb to see a new tab open up with the following:
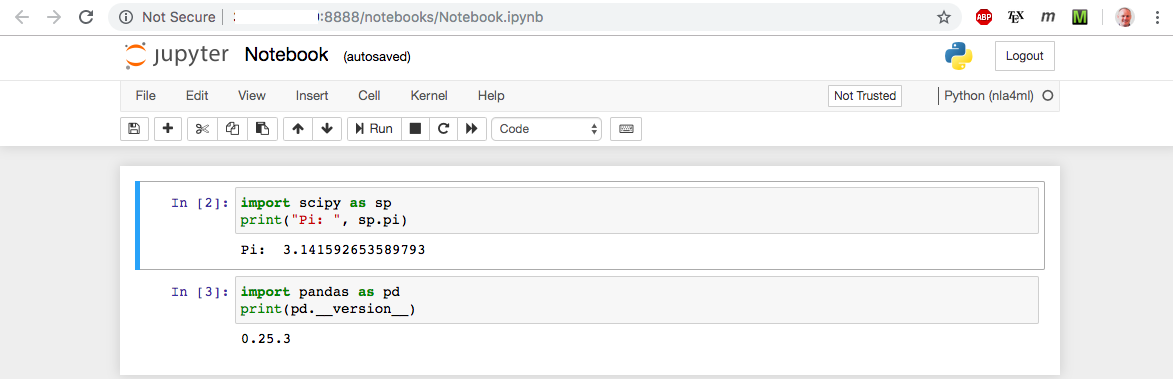
Run the cells by hitting "Shift + Enter" in to the keyboard and make sure everything runs properly and produces the results as shown above.
Shutting Down Jupyter & Your Instance
Shutting down your instance will automatically kill the Jupyter session. You can shut down your instance by going back to the "Compute Engine" page and clicking the box to the left of the instance name and then at the top of the screen pressing the end/box button.
Congrats you ran your first Jupyter notebook on the cloud!
If you want to restart your notebook, simply restart the instance SSH onto it, run the command:
jupyter notebook --ip=0.0.0.0 --port=8888 --no-browser
And repeat the same instructions as before.